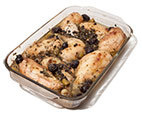
To save time and boost flavor, we ditched the original marinade and
made a paste of the prunes, olives, capers, garlic, and oregano, which
we spread on the chicken and caramelized into the sauce. To boost
meatiness and complexity, we added anchovies and pepper flakes and
browned the chicken skin in a skillet before baking it through.
Serves 4 to 6
Any combination of split breasts and leg quarters can be used in this recipe.
Ingredients:
Paste
1/3
cup pitted green olives, rinsed1/3
cup pitted prunes3
tablespoons extra-virgin olive oil4
garlic cloves, peeled
2
tablespoons capers, rinsed
3
anchovy fillets, rinsed
1/2
teaspoon dried oregano
1/2
teaspoon pepper
1/4
teaspoon kosher salt
Pinch red pepper flakes Chicken
2 1/2 - 3
pounds bone-in, skin-on split chicken breasts and/or leg quarters, trimmed
Kosher salt and pepper
2
teaspoons olive oil
3/4
cup low-sodium chicken broth
1/3
cup white wine
1/3
cup pitted green olives, rinsed and halved
1
tablespoon capers, rinsed
2
bay leaves
1/3
cup pitted prunes, chopped coarse
1
tablespoon unsalted butter
1
teaspoon red wine vinegar
2
tablespoons minced fresh parsley
Preparation:
FOR THE PASTE: Adjust oven rack to middle
position and heat oven to 400 degrees. Pulse all ingredients in food
processor until finely chopped, about ten 1-second pulses. Scrape down
bowl and continue to process until mostly smooth, 1 to 2 minutes.
Transfer to bowl. (Paste can be refrigerated for up to 24 hours.)
FOR THE CHICKEN: Pat chicken dry with paper towels. Sprinkle chicken pieces with 1½ teaspoons salt and season with pepper.
Heat oil in 12-inch skillet over medium-high heat
until just smoking. Add chicken, skin side down, and cook without
moving it until well browned, 5 to 8 minutes. Transfer chicken to large
plate. Drain off all but 1 teaspoon fat from skillet and return to
medium-low heat.
Add 1/3 cup paste to skillet and cook, stirring
constantly, until fragrant and fond forms on pan bottom, 1 to 2 minutes.
Stir in broth, wine, olives, capers, and bay leaves, scraping up any
browned bits. Return chicken to pan, skin side up (skin should be above
surface of liquid), and roast, uncovered, for 15 minutes.
Remove skillet from oven and use back of spoon to
spread remaining paste over chicken pieces; sprinkle prunes around
chicken. Continue to roast until paste begins to brown, breasts register
160 degrees, and leg quarters register 175 degrees, 7 to 12 minutes
longer.
Transfer chicken to serving platter and tent
loosely with aluminum foil. Remove bay leaves from sauce and whisk in
butter, vinegar, and 1 tablespoon parsley; season with salt and pepper
to taste. Pour sauce around chicken, sprinkle with remaining 1
tablespoon parsley, and serve.
Technique
Making Over Marbella
The original chicken Marbella featured chicken parts marinated overnight and then baked.
Problem: Pale, flabby skin Solutions: Ditch the marinade since it turns skin
soggy (and never permeates the flesh anyway). Sear the chicken to crisp
the skin before adding liquid. Problem: Bland meat Solution: Smear a potent paste of capers, garlic,
anchovies, olives, prunes, oregano, and red pepper flakes onto the
chicken after it is seared. Problem: Overly sweet, lackluster sauce Solutions: Eliminate brown sugar and use the
flavorful fond from searing the chicken (plus more caper-prune-olive
paste) to form the base of the sauce. Balance the flavors with butter,
vinegar, and parsley.
To create an Almond Cake with a great appearance and superior almond
flavor, we used finely ground almonds, which had a more pronounced
almond flavor than almond paste, which is used in most cake recipes. And
to create a light cake with a moist open crumb, we used the protein
structure of eggs in place of the denser gluten structure created from
using all-purpose flour.
Best Almond Cake
To perfect this elegant European dessert, we deepened its flavor
and lightened its texture—and did it all in a food processor.
Serves 8 to 10
If you can’t find blanched sliced almonds, grind slivered almonds for
the batter and use unblanched sliced almonds for the topping. Serve
plain or with Orange Crème Fraîche (see related content).
Ingredients
1 1/2
cups plus 1/3 cup blanched sliced almonds, toasted
3/4
cup (3 3/4 ounces) all-purpose flour
3/4
teaspoon salt
1/4
teaspoon baking powder
1/8
teaspoon baking soda
4
large eggs
1 1/4
cups (8 3/4 ounces) plus 2 tablespoons sugar
1
tablespoon plus 1/2 teaspoon grated lemon zest (2 lemons)
3/4
teaspoon almond extract
5
tablespoons unsalted butter, melted
1/3
cup vegetable oil
Instructions
Adjust oven rack to middle position and heat
oven to 300 degrees. Grease 9-inch round cake
pan and line with parchment paper. Pulse 1½ cups
almonds, flour, salt, baking powder, and baking soda
in food processor until almonds are finely ground,
5 to 10 pulses. Transfer almond mixture to bowl.
Process eggs, 1 1/4 cups sugar, 1 tablespoon lemon
zest, and almond extract in now-empty processor until
very pale yellow, about 2 minutes. With processor running,
add melted butter and oil in steady stream, until
incorporated. Add almond mixture and pulse to combine,
4 to 5 pulses. Transfer batter to prepared pan.
Using your fingers, combine remaining 2 tablespoons
sugar and remaining 1/2 teaspoon lemon
zest in small bowl until fragrant, 5 to 10 seconds.
Sprinkle top of cake evenly with remaining 1/3 cup
almonds followed by sugar-zest mixture.
Bake until center of cake is set and bounces back
when gently pressed and toothpick inserted in center
comes out clean, 55 to 65 minutes, rotating pan after
40 minutes. Let cake cool in pan on wire rack for 15
minutes. Run paring knife around sides of pan. Invert
cake onto greased wire rack, discard parchment, and
reinvert cake onto second wire rack. Let cake cool,
about 2 hours. Cut into wedges and serve. (Store cake
in plastic wrap at room temperature for up to 3 days.)
How We Got the Best Almond Flavor—and Cake Texture
For a rich, nutty taste and a consistency that’s not too dense, we toast blanched almonds (we dislike the slight
bitterness imparted by skin-on almonds) to deepen their flavor. Then we grind them in the food processor. The
ground nuts give the crumb an open, rustic texture.
START WITH BLANCHED ALMONDS
TOAST UNTIL GOLDEN BROWN
GRIND WITH FLOUR, SALT, AND LEAVENERS
Egg Foams: Mixer versus Food Processor
The goal when mixing most cake batters is to
incorporate a lot of air into the eggs so that the
cake will bake up light and tall, and a mixer is
usually the best tool to get the job done. For our
Best Almond Cake, however, we wanted a flat,
level top; just a moderate rise; and a texture that
was neither too fluffy nor too dense. Ditching
the mixer in favor of a food processor did the
trick. Here’s why: When eggs and sugar are
whipped in a mixer, the whisk gently unfolds the
protein strands in the eggs while incorporating
lots of air, producing a foam with a strong network
that holds on to that air. The outcome? A
tall, well-risen, domed cake. A food processor,
with its high rpm and very sharp blade, similarly
unravels the eggs’ protein strands and incorporates
air, but it also damages some strands along
the way. The result is just what we were after: a
flatter, slightly denser cake.
i'm not a very good baker. you see the problem here.
Triple-Chocolate Mousse Cake
Why this recipe works:
Triple chocolate mousse cake is a truly decadent dessert. Most times,
though, the mousse texture is exactly the same from one layer to the
next and the flavor is so overpoweringly rich it’s hard to finish more
than a few forkfuls. We set out to tweak this showy confection. By
finessing one layer at a time, starting with the dark chocolate base and
building to the top white chocolate tier, we aimed to create a
triple-decker that was incrementally lighter in texture—and richness.
For simplicity’s sake, we decided to build the whole dessert, layer by
layer, in the same springform pan. For a base layer that had the heft to
support the upper two tiers, we chose flourless chocolate cake instead
of the typical mousse. Folding egg whites into the batter helped lighten
the cake without affecting its structural integrity. For the middle
layer, we started with a traditional chocolate mousse, but the texture
seemed too heavy when combined with the cake, so we removed the eggs and
cut back on the chocolate a bit—this resulted in the lighter, creamier
layer we desired. And for the crowning layer to our cake, we made an
easy white chocolate mousse by folding whipped cream into melted white
chocolate—and to prevent the soft mousse from oozing during slicing, we
added a little gelatin to the mix.
Serves 12 to 16
This recipe requires a springform pan at least 3 inches high. It is
imperative that each layer is made in sequential order. Cool the base
completely before topping it with the middle layer. We recommend
Ghirardelli Bittersweet Chocolate Baking Bar for the base and middle
layers; our other recommended brand of chocolate, Callebaut Intense Dark
L-60-40NV, may be used, but it will produce drier, slightly less sweet
results. Our preferred brand of white chocolate is Guittard Choc-Au-Lait
White Chips. For best results, chill the mixer bowl before whipping the
heavy cream. The entire cake can be made through step 8 and
refrigerated up to a day in advance; leave it out at room temperature
for up to 45 minutes before releasing it from the cake pan and serving.
For neater slices, use a cheese wire or dip your knife in hot water
before cutting each slice.
Ingredients
Bottom Layer
6
tablespoons (3/4 stick) unsalted butter, cut into 6 pieces, plus extra for greasing pan7
ounces bittersweet chocolate, chopped fine (see note)3/4
teaspoon instant espresso powder1 1/2
teaspoons vanilla extract4
large eggs, separatedpinch table salt1/3
cup packed (about 2 1/2 ounces) light brown sugar, crumbled with fingers to remove lumps Middle Layer2
tablespoons cocoa powder, preferably Dutch-processed5
tablespoons hot water7
ounces bittersweet chocolate, chopped fine (see note)1 1/2
cups cold heavy cream1
tablespoon granulated sugar1/8
teaspoon table salt Top Layer 3/4
teaspoon powdered gelatin1
tablespoon water6
ounces white chocolate chips (see note)1 1/2
cups cold heavy creamShaved chocolate or cocoa powder for serving, optional (see note)
Preparation
FOR THE BOTTOM LAYER: Adjust oven rack to middle
position and heat oven to 325 degrees. Butter bottom and sides of
91/2-inch springform pan. Melt butter, chocolate, and espresso powder in
large heatproof bowl set over saucepan filled with 1 inch of barely
simmering water, stirring occasionally until smooth. Remove from heat
and cool mixture slightly, about 5 minutes. Whisk in vanilla and egg
yolks; set aside.
In stand mixer fitted with whisk attachment, beat egg whites and
salt at medium speed until frothy, about 30 seconds. Add half of brown
sugar and beat until combined, about 15 seconds. Add remaining brown
sugar and beat at high speed until soft peaks form when whisk is lifted,
about 1 minute longer, scraping down sides halfway through. Using
whisk, fold one-third of beaten egg whites into chocolate mixture to
lighten. Using rubber spatula, fold in remaining egg whites until no
white streaks remain. Carefully transfer batter to prepared springform
pan, gently smoothing top with offset spatula.
Bake until cake has risen, is firm around edges, and center has
just set but is still soft (center of cake will spring back after
pressing gently with finger), 13 to 18 minutes. Transfer cake to wire
rack to cool completely, about 1 hour. (Cake will collapse as it cools.)
Do not remove cake from pan.
FOR THE MIDDLE LAYER: Combine cocoa powder and
hot water in small bowl; set aside. Melt chocolate in large heatproof
bowl set over saucepan filled with 1 inch of barely simmering water,
stirring occasionally until smooth. Remove from heat and cool slightly, 2
to 5 minutes.
In clean bowl of stand mixer fitted with whisk attachment, whip
cream, granulated sugar, and salt at medium speed until mixture begins
to thicken, about 30 seconds. Increase speed to high and whip until soft
peaks form when whisk is lifted, 15 to 60 seconds.
Whisk cocoa powder mixture into melted chocolate until smooth.
Using whisk, fold one-third of whipped cream into chocolate mixture to
lighten. Using rubber spatula, fold in remaining whipped cream until no
white streaks remain. Spoon mousse into springform pan over cooled cake
and gently tap pan on counter 3 times to remove any large air bubbles;
gently smooth top with offset spatula. Wipe inside edge of pan with damp
cloth to remove any drips. Refrigerate cake at least 15 minutes while
preparing top layer.
FOR THE TOP LAYER: In small bowl, sprinkle
gelatin over water; let stand at least 5 minutes. Place white chocolate
in medium bowl. Bring ½ cup cream to simmer in small saucepan over
medium-high heat. Remove from heat; add gelatin mixture and stir until
fully dissolved. Pour cream mixture over white chocolate and whisk until
chocolate is melted and mixture is smooth, about 30 seconds. Cool to
room temperature, stirring occasionally, 5 to 8 minutes (mixture will
thicken slightly).
In clean bowl of stand mixer fitted with whisk attachment, whip
remaining cup cream at medium speed until it begins to thicken, about 30
seconds. Increase speed to high and whip until soft peaks form when
whisk is lifted, 15 to 60 seconds. Using whisk, fold one-third of
whipped cream into white chocolate mixture to lighten. Using rubber
spatula, fold remaining whipped cream into white chocolate mixture until
no white streaks remain. Spoon white chocolate mousse into pan over
middle layer. Smooth top with offset spatula. Return cake to
refrigerator and chill until set, at least 2½ hours.
TO SERVE: If using, garnish top of cake with
chocolate curls or dust with cocoa. Run thin knife between cake and side
of springform pan; remove side of pan. Run cleaned knife along outside
of cake to smooth sides. Cut into slices and serve.
Step-by-Step
Triple-Decker Construction
Our Triple-Chocolate-Mousse Cake is assembled in one pan and features progressively lighter layers.
BOTTOM LAYER A modified flourless chocolate
cake made with whipped egg whites, egg yolks, butter, dark chocolate,
and sugar provides a sturdy—but not dense—base. The cake collapses as it
cools.
MIDDLE LAYER The layer's silky yet sliceable
consistency is similar to regular mousse in texture, with flavor from
dark chocolate and cocoa powder.
TOP LAYER Made with whipped cream and white
chocolate, this layer is the lightest in flavor and texture. The
addition of a little gelatin helps to make the topping sliceable.
Step-by-Step
Slicing Soft Cake
To create perfectly smooth slices of soft desserts, the best
tool is not a knife. It's a cheese wire—the minimal surface area
produces less drag for cleaner, neater slices. If you don't have a
cheese wire, dental floss will work almost as well.
1. Hold the handles and pull the wire taut. Using
your thumbs to apply even pressure, slice down through the cake. Wipe
the wire clean with a dry towel.
2. Make a second cut, perpendicular to the first. Continue to make cuts around the circumference.
Technique
Making Chocolate Curls
Wispy chocolate curls are an easy way to decorate desserts.
Use a vegetable peeler to peel curls off of a large block of milk or
dark chocolate. (Large blocks of chocolate make nicer shavings than thin
bars of chocolate.)
dooooood. quite possibly my favorite dish growing up. Turkey Tetrazzini Pasta Why It Works Microwaving or reheating leftover turkey in the oven often dries it out.
To keep the meat moist for our Turkey Tetrazzini Pasta, we placed
slices of leftover turkey in a steamer basket set in a pot of simmering
water, then covered the pot and checked it every few minutes. The turkey
heated quickly and stayed juicy. We used leftover Thanksgiving turkey
here, but at other times of the year we found we could substitute the
meat of one rotisserie chicken.
Serves 4
Ingredients
2
tablespoons unsalted butter
10
ounces white mushrooms, sliced thin
Salt and pepper
2
garlic cloves, minced
1
cup heavy cream
1
tablespoon dry sherry
1 1/2
cups grated Parmesan cheese
1
pound spaghetti
3
cups cooked turkey meat, cut into bited-sized pieces (see tip above)
2
cups frozen peas, thawed
Preparation
Bring 4 quarts water to boil in large pot. Melt
butter in large skillet over medium-high heat. Cook mushrooms, ¼
teaspoon salt, and ¼ teaspoon pepper until golden brown, about 10
minutes. Add garlic and cook until fragrant, about 30 seconds. Stir in
cream and sherry and simmer until slightly thickened, about 2 minutes.
Off heat, stir in Parmesan. Cover and keep warm.
Add 1 tablespoon salt and pasta to boiling water
and cook until al dente. Reserve 1 cup pasta cooking water, drain pasta,
and return to pot. Add mushroom sauce, turkey, and peas, and ½ cup
reserved pasta water to pot and toss to combine, adding additional
reserved pasta water as needed. Season with salt and pepper. Serve.
Brussels Sprout Salad with Cheddar, Hazelnuts, and Apple
From Cook's Country
Why this recipe works:
Instead of roasted Brussels sprouts, we wanted a light, bright, raw
preparation that was just as delicious. Shredding the Brussels sprouts
super-thin is key, and letting them sit in the dressing for at least 30
minutes softens them fully and seasons them deeply. To flavor the salad,
we chose a simple lemon vinaigrette, rounded out with shallot and
mustard. Sweet fruit, crunchy nuts, and creamy cheese are the finishing
touches.
Serves 8
Slice the sprouts as thin as possible. Shred the cheddar on the large holes of a box grater.
Ingredients
3
tablespoons lemon juice2
tablespoons Dijon mustard1
small shallot, minced1
garlic clove, mincedSalt and pepper6
tablespoons extra-virgin olive oil2
pounds Brussels sprouts, trimmed, halved, and sliced very thin4
ounces sharp cheddar cheese, shredded (1 cup)1
Granny Smith apple, cored and cut into 1/2-inch pieces1/2
cup hazelnuts, toasted, skinned, and chopped
Instructions
Whisk lemon juice, mustard, shallot, garlic and
1/2 teaspoon salt together in large bowl. Slowly whisk in oil until
incorporated. Toss Brussels sprouts with vinaigrette, and let sit for at
least 30 minutes or up to 2 hours.
Fold in cheddar, apple, and hazelnuts. Season with salt and pepper to taste. Serve.
How to Slice Brussels Sprouts
You can use the slicing disk of your food processor or slice
the sprouts with a chef’s knife. Follow these steps to do the latter
safely and quickly.
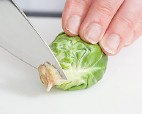
1. Trim: Trim the stem end of each sprout and then cut each sprout in half through the cut end.
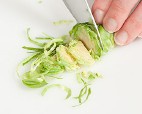
2. Slice: With the flat surface on the cutting board, thinly slice each half.
Canned pumpkin puree often lends a raw, metallic flavor to pumpkin
bread. We cook down the puree to eliminate those off-putting flavors.
Instead of dirtying more dishes, we mix the quick bread right in the
pot, adding cream cheese and buttermilk for their tangy flavor. A
quick-to-assemble topping adds texture and keeps the loaf from getting
soggy the next day.
Makes 2 loaves
The test kitchen’s preferred loaf pan measures 8 1/2 by 4 1/2 inches;
if using a 9 by 5-inch loaf pan, start checking for doneness five
minutes early.
Ingredients
Topping
5
tablespoons packed (2 1/4 ounces) light brown sugar
1
tablespoon all-purpose flour
1
tablespoon unsalted butter, softened
1
teaspoon ground cinnamon
1/8
teaspoon saltBread2
cups (10 ounces) all-purpose flour
1 1/2
teaspoons baking powder
1/2
teaspoon baking soda
1 (15-ounce) can unsweetened pumpkin puree
1
teaspoon salt
1 1/2
teaspoons ground cinnamon
1/4
teaspoon ground nutmeg
1/8
teaspoon ground cloves
1
cup (7 ounces) granulated sugar
1
cup packed (7 ounces) light brown sugar
1/2
cup vegetable oil
4
ounces cream cheese, cut into 12 pieces
4
large eggs
1/4
cup buttermilk
1
cup walnuts, toasted and chopped fine
Instructions
For the topping: Using fingers, mix all ingredients together in bowl until well combined and topping resembles wet sand; set aside.
For the bread: Adjust oven rack to middle
position and heat oven to 350 degrees. Grease two 8 1/2 by 4 1/2-inch
loaf pans. Whisk flour, baking powder, and baking soda together in bowl.
Combine pumpkin puree, salt, cinnamon, nutmeg,
and cloves in large saucepan over medium heat. Cook mixture, stirring
constantly, until reduced to 1½ cups, 6 to 8 minutes. Remove pot from
heat; stir in granulated sugar, brown sugar, oil, and cream cheese until
combined. Let mixture stand for 5 minutes. Whisk until no visible
pieces of cream cheese remain and mixture is homogeneous.
Whisk together eggs and buttermilk. Add egg
mixture to pumpkin mixture and whisk to combine. Fold flour mixture into
pumpkin mixture until combined (some small lumps of flour are OK). Fold
walnuts into batter. Scrape batter into prepared pans. Sprinkle topping
evenly over top of each loaf. Bake until skewer inserted in center of
loaf comes out clean, 45 to 50 minutes. Let breads cool in pans on wire
rack for 20 minutes. Remove breads from pans and let cool for at least
1½ hours. Serve warm or at room temperature.
One hundred percent whole-wheat muffins can often be dense, squat
sinkers that nobody wants to eat. Our goal was to fix that problem.
After combining two leaveners and incorporating ingredients with high
amounts of moisture (buttermilk, eggs, and blueberries) and a mix of
melted butter and oil with 100 percent whole-wheat flour, we were
ecstatic to find our blueberry muffins as tender as they are. After a
sprinkle of streusel on the top of the muffin, we now had a tender,
slightly sweet whole-wheat muffin with that signature nutty, whole-wheat
flavor.
Makes 12 Muffins
Do not overmix the batter. You can substitute frozen (unthawed) blueberries for fresh in this recipe.
For the streusel:Combine granulated sugar, brown
sugar, flour, and salt in bowl. Add melted butter and toss with fork
until evenly moistened and mixture forms large chunks with some pea-size
pieces throughout; set aside.
For the muffins:Adjust oven rack to middle
position and heat oven to 400 degrees. Spray 12-cup muffin tin,
including top, generously with vegetable oil spray. Whisk flour, baking
powder, baking soda, and salt together in large bowl. Whisk sugar, eggs,
melted butter, and oil together in separate bowl until combined, about
30 seconds. Whisk buttermilk and vanilla into sugar mixture until
combined.
Stir sugar mixture into flour mixture until just
combined. Gently stir in blueberries until incorporated. Using heaping
1/4-cup dry measuring cup, divide batter evenly among prepared muffin
cups (cups will be filled to rim); sprinkle muffin tops evenly with
streusel.
Bake until golden brown and toothpick inserted in
center comes out with few crumbs attached, 18 to 20 minutes, rotating
muffin tin halfway through baking. Let muffins cool in muffin tin on
wire rack for 5 minutes. Remove muffins from muffin tin and let cool 5
minutes longer. Serve.
Don’t Make this Mistake: Heavy and Dense Muffins
You can’t simply swap whole-wheat flour into a regular muffin
recipe and expect it to work. But if you know the science behind baking
and account for the variables, you can make great blueberry muffins
using 100 percent whole-wheat flour.
The wrong whole-wheat muffin . . .Makes for a fine doorstop . . . but bad eating.
so, i threw this together last night after reading several meatloaf recipes online (largely using ina garten's for flavor profile). all amounts approximated.
4 hearty servings
somebody else's rando turkey meatloaf, but mine looked pretty similar, though cut into a wedge, not a slice.
Ingredients
1 lb 93% lean ground turkey
< 1/4 of an onion, chopped (i used purple, but i think yellow would be even better)
c. 1+ t garlic powder
c. 1+ t onion powder
large pinch dried thyme (fresh would kill)
salt (the more mustard/soy/worcestershire/spices you have, the less salt you'll need; play it by ear)
freshly ground pepper
1 T dijon mustard (i sometimes use stone-ground)
soy sauce (worcestershire would be even better, i think)
1/4+ c ketchup, divided
1 egg, whisked
c. 1 c bread crumbs (i had plain, but i think italian would be fun)
1ish t extra-virgin olive oil
Additional Optional Add-Ins
chopped olive tapenade–type thing (i just happened to have this on hand and thought it was really fun; by no means necessary; or try other savory spreads here. how about pickled veg? chopped artichoke spread?)
chopped fresh parsley (this is the husband's suggestion, and i agree it would be killer)
large-dice hard-boiled egg (also his addition, which i think is brilliant. growing up i knew a family that used to bake whole hard-boiled eggs into
their meatloaf, which i think is amazing. and would make for a killer
'50s-era-looking cross-section, no? i will do this one day.)
ooked, chopped -- so it's not stringy to the bite -- well-seasoned (key!) spinach (be sure all the extra water is squeezed out, or it will eff with your loaf, man)
Preparation
preheat the oven to 325^F.
in a large mixing bowl, gently combine the turkey, chopped onion, garlic powder, onion powder, thyme, maybe 1ish t salt, as many cracks of pepper as appeal, dijon mustard, a few good glugs of soy sauce, 2ish T ketchup, and whisked egg. (if you are adding in additional ingredients -- like the suggested tapenade, fresh parsley, and hard-boiled egg -- now's your cue.)
once the mixture is just barely combined, with a fair distribution of the ingredients, mix in the bread crumbs, using an easy hand. you don't want to overwork the mixture. combine until it feels solid enough to hold together without becoming tough or dry feeling. you may need to add additional bread crumbs 'til you get the right feel (see notes about wet vs. dry ingredients below). just experiment.
oil the bottom of a square 8" x 8" cake pan (or really any oven-safe vessel that will give your meat goodness room to breathe -- i say this because if you use the traditional loaf pan i can't be sure how the temp and times will change). place the meat mixture into it, patting it into an even circle (or, really, whatever damned shape you fancy). spread another 2ish T ketchup on the top of the loaf.
bake in the middle of the oven for 40 to 50 minutes. you want the meat to hold together nicely without any pink remaining, but you don't want to overcook, or it will become dry and tough. i don't have a meat thermometer and so just cut the whole thing in half when i suspected it was done to check it; imperfect but effective.
serve with something super nummy like mashed potatoes and a simple salad. note that this loaf is tasty hot out of the oven, at room temperature, or even cold (especially in a sandwich). vee obliging, this turkey meatloaf.
A Word On Breadcrumbs
the more dry
ingredients you have -- any grated cheeses, chopped eggs, abundant
spices and herbs, etc. -- the less breadcrumb you'll need; the more wet
ingredients -- soy/worcestershire, mustard, egg, etc. -- the more
breadcrumb you'll need.
Mrs. Cochran's Perfect Pecan Pie, Courtesy of Sweetie-licious Note: To make this a chocolate pecan pie, add 1/2ish cup semi-sweet chocolate chips to bottom of pie before pouring in filling? Yes? Dark chocolate? Other? —dj
Ingredients 3 eggs ½ C. sugar ½ C. dark brown sugar ½ tsp. salt 3 Tbsp. butter, melted ¾ C. dark corn syrup 1 Tbsp. flour 1 C. whipping cream 1 tsp. vanilla 2 Tbsp. brandy 2 C. pecan, chopped or whole
Eggnog ice cream, to serve Preparation
Preheat oven to 375 degrees. In a medium mixing bowl, beat together the
eggs, sugars, butter, corn syrup, flour, and cream. Stir in the vanilla,
brandy, and pecans. Pour into an unbaked frozen pie shell.
Bake for
45-60 minutes or until the filling is set. Cool. Serve with eggnog ice
cream . . . and enjoy!
Tyler Florence's Chive and Garlic Mashed Potatoes serves 4 to 6
Ingredients
6 to 8 large Yukon gold potatoes, peeled and quartered 1 tablespoon salt 4 bay leaves 1 cup heavy cream 1/2 stick (1/4 cup) butter 4 cloves garlic, lightly crushed 3 sprigs fresh thyme Kosher salt and freshly ground black pepper 2 tablespoons chopped chives
Preparation
Put the cut potatoes into a large pot, cover them with cold water,
and add salt and 2 bay leaves. Bring to a boil and simmer until the
potatoes are fork tender, about 20 to 30 minutes. Drain well and remove
the bay leaves.
Meanwhile, in a small pot heat the cream, butter,
garlic, thyme, and remaining bay leaves. While the potatoes are still
warm, press them through a potato ricer or food mill into a mixing bowl.
Add the warm cream, straining out the solids, a bit at a time until the
potatoes are fluffy. Season with salt and pepper and gently stir in the
chives. Serve immediately.
Tyler Florence's Test Kitchen Stuffing Makes enough to stuff one turkey.
Ingredients 4 cupsSourdough Bread (torn into 1" pieces, without the crusts) 2 tablespoonsGrapeseed or Vegetable oil 1/2 poundSage Breakfast Sausage (crumbled) 1/2 cup Diced Carrots 1/2 cupDiced Celery 1/2 cup Diced Onion 5 Sage Leaves 3 Thyme Sprigs Kosher Salt Freshly Ground Black Pepper 2/3 cupChicken Stock 1 Egg Preparation
Preheat the oven to 375°F. Toast the Bread on a sheet pan in the oven for about 15 minutes until crisp and golden.
Heat
the Oil over medium-high heat in a large saucepan then add the Sausage
and let it brown. After it's nice and golden on one side, stir to get
color all over. Add the Carrots, Celery, and Onion, followed by the Sage
and Thyme. Turn the heat down to medium and cook, stirring
occasionally, to keep the cooking even. Season with Salt and Pepper.
When the vegetables are aromatic and tender, add a splash of Water if
necessary to loosen the brown bits from the bottom of the pan. Add the
Toasted Bread and the Chicken Stock and mix.
Remove
the Thyme Sprigs and pull the Leaves off. Add the Leaves back to the
stuffing and then transfer the stuffing to a food processor. Process
until fairly smooth, adding the Egg while pureeing (if you're doubling
the recipe for extra stuffing, puree only half the stuffing; the rest
you can bake as directed below).
Transfer the stuffing to a piping bag (or a large zip top bag with a comer snipped off).
If
you would like to have the stuffing as a stand-alone dish, skip the
pureeing. Transfer the stuffing mixture to a greased baking dish and
cook in a 350°F oven until the top is golden brown.
Yield: About 12 pancakes Prep Time: 15 minutes Cook Time: 15 minutes Total Time: 30 minutes
Ingredients:
2 1/4 cups white whole wheat flour
2 teaspoons baking powder
1/2 teaspoon baking soda
1/2 teaspoon coarse salt
3/4 teaspoon cinnamon
1/4 teaspoon ground nutmeg
2 tablespoons brown sugar
1 tablespoon granulated sugar
2 cups buttermilk
4 tablespoons unsalted butter, melted and cooled
2 large eggs
1 teaspoon vanilla extract
1 cup grated zucchini
Maple syrup and butter, for serving
Preparation:
In a large bowl, whisk together flour, baking powder, baking soda, salt, cinnamon, nutmeg, and sugars.
In a separate bowl, whisk together buttermilk, melted butter,
eggs, and vanilla extract. Pour liquid ingredients over dry ingredients,
stirring until just combined. Fold in the zucchini.
Heat a griddle or pan to medium heat. Spray with cooking spray.
Pour about a 1/2 cup of batter onto heated skillet. Cook until surface
of pancakes have some bubbles and a few have burst, about 3 minutes.
Flip carefully with a spatula, and cook until browned on the underside.
Continue making pancakes until the batter is gone. Serve pancakes with
butter and maple syrup, if desired.
Note from the recipe's originator -- We use white whole wheat flour, but you can use all-purpose
flour or whole wheat flour. These pancakes freeze well. Wrap them in
plastic wrap and place in a freezer bag. Will keep in the freezer for up
to 2 months.
Chicken souvlaki is almost always made with chunks of boneless
skinless breasts, which have a marked tendency to dry out when grilled.
To prevent this, we swap the traditional overnight soak in an acidic
marinade for a quick 30-minute brine while the grill heats. We then toss
the chunks of chicken in a flavorful mixture of lemon, olive oil,
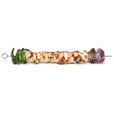
herbs, and honey right before grilling. To prevent the end pieces from
overcooking, we protect the chicken by threading pepper and onion pieces
on the ends. Once cooked, the chicken is tossed with reserved sauce to
ensure that the exterior is brightly flavored and just as tender and
moist as the interior.
Grilled Chicken Souvlaki
Bright lemon flavor and charred-yet-moist, evenly cooked meat are the
hallmarks of good souvlaki. They’re also the hardest traits to get
right.
Serves 4
This tzatziki is fairly mild; if you like a more assertive
flavor, double the garlic. A rasp-style grater makes quick work of
turning the garlic into a paste. We like the chicken as a wrap, but you
may skip the pita and serve the chicken, vegetables, and tzatziki with
rice. You will need four 12-inch metal skewers. For tips on wrapping the
sandwich in foil, see related content.
Ingredients
Tzatziki Sauce
1
tablespoon lemon juice1
small garlic clove, minced to paste3/4
cup plain Greek yogurt1/2
cucumber, peeled, halved lengthwise, seeded, and diced fine (1/2 cup)3
tablespoons minced fresh mint1
tablespoon minced fresh parsley3/8
teaspoon saltChicken
Salt and pepper1 1/2
pounds boneless, skinless chicken breasts, trimmed and cut into 1-inch pieces1/3
cup extra-virgin olive oil2
tablespoons minced fresh parsley1
teaspoon finely grated lemon zest plus 1/4 cup juice (2 lemons)1
teaspoon honey1
teaspoon dried oregano1
green bell pepper, quartered, stemmed, seeded, each quarter cut into 4 chunks1
small red onion, ends trimmed, peeled, halved lengthwise, each half cut into 4 chunks4
(8-inch) pita breads
Preparation
FOR THE TZATZIKI SAUCE: Whisk lemon juice and
garlic together in small bowl. Let stand for 10 minutes. Stir in yogurt,
cucumber, mint, parsley, and salt. Cover and set aside.
FOR THE CHICKEN: Dissolve 2 tablespoons salt in 1
quart cold water. Submerge chicken in brine, cover, and refrigerate for
30 minutes. While chicken is brining, combine oil, parsley, lemon zest
and juice, honey, oregano, and 1/2 teaspoon pepper in medium bowl.
Transfer 1/4 cup oil mixture to large bowl and set aside to toss with
cooked chicken.
Remove chicken from brine and pat dry with paper
towels. Toss chicken with remaining oil mixture. Thread 4 pieces of bell
pepper, concave side up, onto one 12-inch metal skewer. Thread
one-quarter of chicken onto skewer. Thread 2 chunks of onion onto
skewer, and place skewer on plate. Repeat skewering remaining chicken
and vegetables on 3 more skewers. Lightly moisten 2 pita breads with
water. Sandwich 2 unmoistened pita breads between moistened pita breads
and wrap stack tightly in lightly greased heavy-duty aluminum foil.
FOR A CHARCOAL GRILL: Open bottom vent
completely. Light large chimney starter mounded with charcoal briquettes
(7 quarts). When top coals are partially covered with ash, pour evenly
over half of grill. Set cooking grate in place, cover, and open lid vent
completely. Heat grill until hot, about 5 minutes.
FOR A GAS GRILL: Turn all burners to high,
cover, and heat grill until hot, about 15 minutes. Leave primary burner
on high and turn off other burner(s).
Clean and oil cooking grate. Place skewers on
hotter side of grill and cook, turning occasionally, until chicken and
vegetables are well browned on all sides and chicken registers 160
degrees, 15 to 20 minutes. Using fork, push chicken and vegetables off
skewers into bowl of reserved oil mixture. Stir gently, breaking up
onion chunks; cover with foil and let sit for 5 minutes.
Meanwhile, place packet of pitas on cooler side of grill. Flip occasionally to heat, about 5 minutes.
Lay each warm pita on 12-inch square of foil.
Spread each pita with 2 tablespoons tzatziki. Place one-quarter of
chicken and vegetables in middle of each pita. Roll into cylindrical
shape and serve.
Marinate Twice
Briefly soaking the grilled chicken and vegetables in some
reserved marinade before wrapping them in a pita rehydrates their dry
exteriors and delivers bright citrus punch.
Softening Supermarket Pita
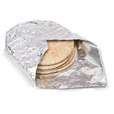
To soften up dry, tough supermarket pita, we moisten two of the
breads with a little water and then stack them on either side of two
unmoistened pieces. Then we steam the breads in a foil-wrapped stack on
the cooler side of the grill while the cooked chicken rests.
A Vegetable Shield
The age-old problem with grilling meat on a stick: The end pieces
overcook. We protect the chicken by threading pepper and onion pieces on
the ends. The charred vegetables taste great in the sandwich, too.